Depth of Field: Controlling Blur and Sharpness
Learn to control depth of field in photography. Master aperture, focal length and bokeh to create images with a precise visual narrative.
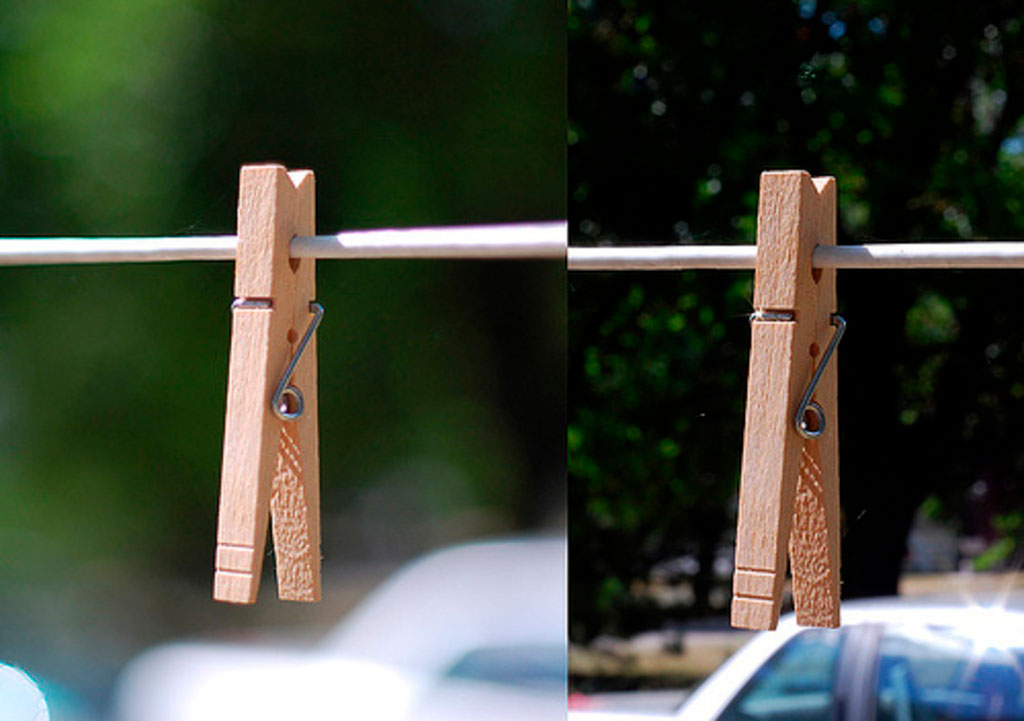
Depth of field (DoF) is one of the most powerful tools for storytelling with the camera. With it you decide whether the background dissolves to isolate the subject or the entire scene stays sharp and every detail adds information.
The most common mistake is thinking depth of field depends only on opening the aperture to the maximum. In reality, several factors come into play: aperture, distance to the subject, focal length and even sensor size. Mastering these variables gives you the freedom to choose between an intimate portrait with creamy bokeh, a landscape sharp to the horizon or a street scene where subject and surroundings converse in balance.
What does depth of field depend on?
Aperture: the wider the aperture (f/1.8, f/2.8), the shallower the depth of field. Stopping down (f/8, f/11) gains sharpness across several layers of the scene.
Distance to the subject: moving closer reduces DoF; moving away expands it. That's why a tight portrait has less margin for sharpness than a photo from far away.
Focal length: at the same distance to the subject, telephotos compress the background and reduce DoF; wide angles expand the sharp range.
Sensor size: smaller sensors (APS-C, Micro Four Thirds) tend to offer more depth of field than a full frame under equivalent conditions.
Understanding how these four variables interact changes the way you plan each shot. For example, a portrait with an 85mm f/2.8 from 2 meters will have much less DoF than the same portrait with a 35mm f/2.8 from the same distance, even though the aperture is identical. Focal length multiplies the effect of the aperture in ways that aren't always intuitive at first.
What aperture do I use for each genre?
Genre: Portrait; Aperture: f/1.8–f/2.8; How to work it: Distant background and a telephoto; separate the subject with soft blur
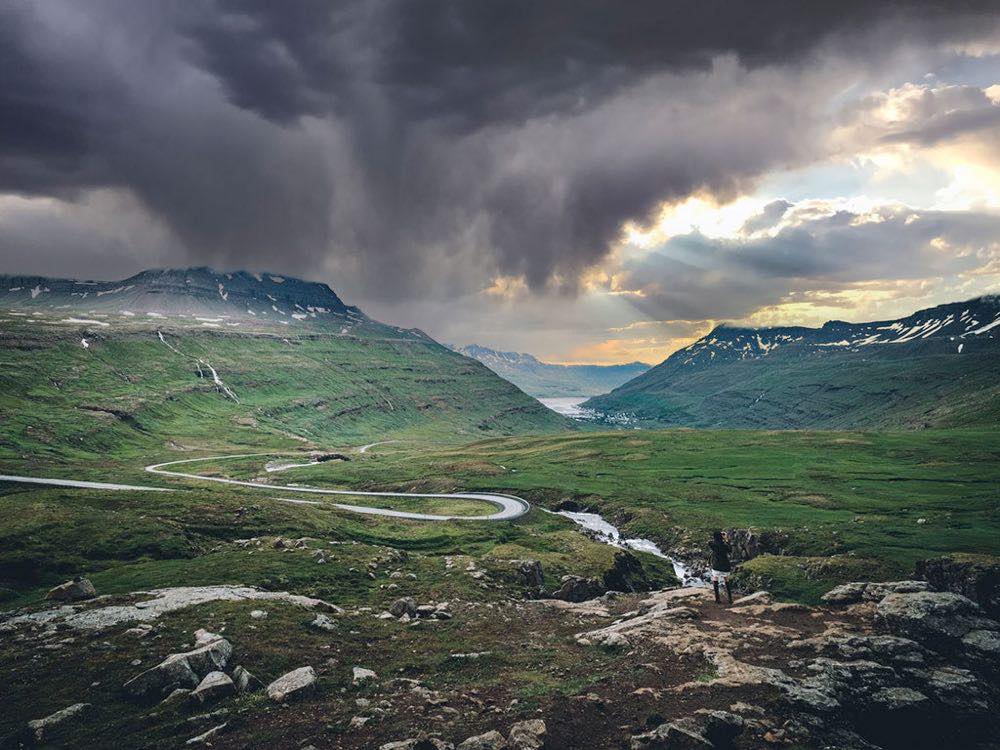
Genre: Landscape; Aperture: f/8–f/11; How to work it: Focus at the hyperfocal distance, from the foreground to the horizon
Genre: Macro; Aperture: f/8–f/16; How to work it: Focus stacking: at short distances DoF is minimal
Genre: Street and environmental; Aperture: f/5.6; How to work it: The subject stands out without losing context
So you don't have to estimate by eye, the depth of field calculator gives you the exact sharp zone for your focal length, aperture and distance.
These values are starting points, not fixed rules. An editorial portrait can benefit from a smaller aperture to include elements of the environment. A minimalist landscape can gain from a wide aperture that blurs the horizon and highlights an element in the foreground.
Advanced techniques for controlling depth of field
One of the keys in landscape is calculating the hyperfocal distance, which ensures maximum sharpness across the entire frame. The hyperfocal calculator solves the calculation without field tests, and the guide to depth of field explains where that number comes from. The hyperfocal distance changes with focal length and aperture: for a 24mm at f/11, it is around 1.8 meters on full frame, which means everything from about 0.9 meters to infinity will be sharp.
Another useful technique is previewing in live view, since the screen shows how the aperture affects DoF before you shoot. On cameras with a depth-of-field preview button, stopping down the aperture to see the real scene before shooting avoids unpleasant surprises.
Focus stacking is the solution for macro and product photography where depth of field is insufficient even at f/16. The technique consists of taking several photos with different focus points and combining them in post-production to get a completely sharp image.
In scenes where bokeh is the star, separating the subject from the background is usually more effective than opening the aperture to the maximum. A subject 2 meters from the photographer with the background at 10 meters will produce much more pronounced blur than the same subject with the background at 3 meters, even if the aperture is identical.
What does blur tell the viewer?
DoF is not just a technical variable: it is a narrative decision. When you use shallow depth of field, you tell the viewer: "this is what matters; the rest is context." When you use a lot, you invite them to explore the whole scene and discover details on different planes.
A documentary photographer may prefer a medium aperture that includes both the subject and the surroundings, telling the story more completely. A fashion photographer may use f/1.4 to isolate the model completely and give absolute prominence to the clothing or the gesture. Both decisions are correct as long as they respond to a clear intention.
The relationship between dynamic visual composition and depth of field is close: a well-thought-out composition with appropriate DoF creates images where the viewer's eye knows exactly where to go and how to travel through the scene.
The four mistakes that cost you
Many photographers fall into the habit of always shooting at the widest possible aperture. This not only limits the narrative, it also creates focus problems. Another frequent mistake is ignoring that distance to the subject influences as much as aperture: a photo at f/2.8 from far away will be sharper than a close-up at the same value.
It is also important to remember that small sensors offer more DoF, which makes it harder to achieve extreme blur. And using apertures like f/22 thinking "more sharpness" is usually counterproductive, since diffraction reduces image quality.
Practical tips for mastering depth of field
Choose the aperture according to your narrative intention: open up to isolate, stop down to contextualize. A good exercise is to try three different apertures on each scene and analyze how the relationship between subject and background changes.
Don't look only at how blurry the background gets: observe the blur transition (bokeh), since its softness or harshness can completely change the aesthetic feel. An 85mm f/1.8 generally produces softer, rounder bokeh than a 50mm f/1.8, due to the optical design and the usual working distance.
Frequently asked questions about depth of field
What is the hyperfocal distance and why is it important?
It is the focus distance that maximizes the sharp zone in the photo. When you focus at the hyperfocal distance, everything from half that distance to infinity falls within the depth of field. In landscape it is what keeps the foreground and background equally clear.
Does bokeh depend only on aperture?
No. The distance between the camera and the subject, the distance between the subject and the background, the lens's focal length and the optical design also influence it. An 85mm f/1.8 and a 35mm f/1.8 offer very different blur even at the same aperture.
How do I get strong blur with a small sensor?
Move closer to the subject, use long focal lengths and try to keep backgrounds as far from the subject as possible. That way you maximize separation and the bokeh effect, compensating for the greater depth of field inherent to smaller sensors.
Is it true that the image is sharper at f/22?
Not necessarily. Beyond a certain aperture (generally f/11 or f/16 on most lenses), diffraction starts to reduce real sharpness. The optimal aperture of most lenses is usually between f/5.6 and f/11.
The three-aperture exercise
Choose a scene and shoot it at three different apertures without moving your feet. Then compare: you'll see that what changes the blur most is not the aperture, but how far you separated the subject from the background.
And the next time you want more bokeh, first try moving the background farther away before opening the aperture. A subject at 2 meters with the background at 10 blurs much more than the same subject with the background at 3, even if the aperture is identical.
The 44 cards from Enfogram come with these apertures by genre and the hyperfocal reminders printed on them, so you can decide on location and not at home.