Landscape Composition: Strong Foregrounds
Master landscape composition with powerful foregrounds: what to look for, how to place them, and which aperture and focus distance to use.
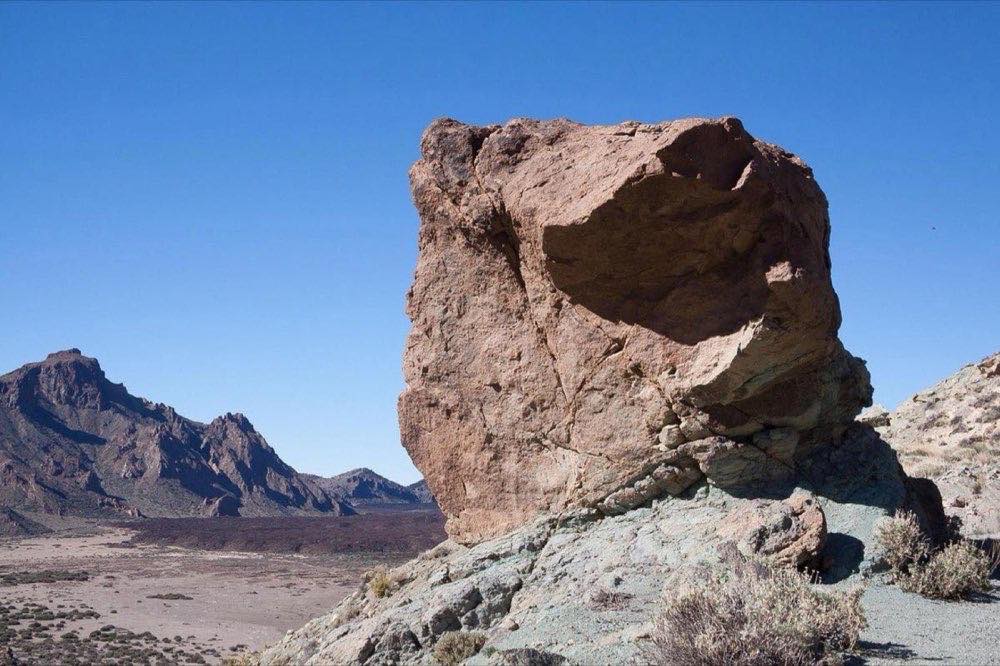
There is an enormous difference between photographing a beautiful place and making a photograph that pulls the viewer into the scene. That difference almost always lies in the foreground. Landscape composition with a strong foreground turns a flat postcard into a three-dimensional image: it gives the eye an entry point, a reference for scale and a path to the background.
The problem is that foregrounds don't show up on their own. When we arrive at a spectacular viewpoint, the instinct is to raise the camera toward the horizon and shoot. The result: a strip of sky, a strip of mountain and an empty lower third that adds nothing.
Why does the foreground decide the photo?
A photograph is a two-dimensional plane trying to represent depth. The brain reconstructs that third dimension from cues: overlapping planes, changes in the size of familiar elements and converging lines. The foreground activates all three at once.
When you include some rocks a meter from the camera and a mountain range ten kilometers away, the mind calculates the distance between them and "feels" the space. Without that nearby anchor, the mountain is a desktop wallpaper. This idea of building the image in layers is the heart of narrative landscape photography, where each plane tells part of the story.
A good foreground fulfills at least one of these functions:
Anchor: gives the eye a place to land before it travels through the scene.
Scale: a flower or a rock of known size gives the landscape dimension.
Direction: lines that point toward the main subject (a stream, cracks in the rock, a trail).
Context: tells what the place is made of (lava, sand, lichen, ice).
Which foregrounds really work?
Not everything at your feet is useful. Look for elements with shape, texture or color that talk to the background:
Rocks with character: edges, cracks or colorful lichens. Avoid round, gray, textureless stones.
Moving water: a stream winding toward the background is the perfect leading line.
Vegetation: flowers in spring, golden grasses in autumn. An odd-numbered group (3 or 5 flowers) works better than a uniform mass.
Ground patterns: cracked mud, sand ripples, fractured ice.
Puddles and reflections: they duplicate the sky or the mountain and fill the lower third with information.
Practical field rule: when you arrive at a location, spend the first ten minutes walking while looking at the ground, not the horizon. Find the foreground first and build the composition from there backward.
Which aperture, and where do I focus?
Getting very close to a nearby element stretches the depth of field you need. These are the starting settings:
Aperture: f/11 is the sweet spot for most scenes with a foreground at 1–2 meters. f/16 only if the element is closer than 80 cm (you lose some sharpness to diffraction, but gain coverage).
Focus: focus at the hyperfocal distance or, more simply, one third into the scene (roughly twice the distance to the foreground).
ISO: 100 with a tripod; raise it to 400–800 if you shoot handheld in wind.
Shutter speed: whatever the metering gives; with a tripod it doesn't matter, handheld don't go below 1/(focal length × 2).
With a 16–20 mm wide-angle at f/11 focusing at 1.5 meters, you'll have sharpness from about 60 cm to infinity. If the foreground is closer, or the aperture isn't enough, the solution is focus stacking, which the guide to depth of field explains in detail.
Reference table: focal length, distance and aperture
Focal length: 16 mm; Distance to foreground: 0.5–1 m; Aperture: f/16; Where to focus: ~1 m (near the hyperfocal distance)
Focal length: 16 mm; Distance to foreground: 1–2 m; Aperture: f/11; Where to focus: ~1.5 m
Focal length: 24 mm; Distance to foreground: 1–2 m; Aperture: f/16; Where to focus: ~2 m
Focal length: 24 mm; Distance to foreground: 2–4 m; Aperture: f/11; Where to focus: ~3 m
Focal length: 35 mm; Distance to foreground: 3–5 m; Aperture: f/11; Where to focus: ~5 m
Focal length: 35 mm; Distance to foreground: < 2 m; Aperture: f/16 + stacking; Where to focus: 2–3 staggered shots
The values are approximate for full frame; on APS-C you gain some margin from the equivalent focal length.
Placement: camera height and visual weight
The most common mistake isn't choosing the wrong foreground, but placing it badly in the frame:
Lower the camera. At eye level, the foreground ends up small and stuck to the bottom edge. At 30–50 cm from the ground, it grows and separates from the middle ground. Many of the best landscape photos are made with the tripod almost fully collapsed.
Mind the space between planes. Leave visual "air" between the foreground and the background: if the rock visually touches the base of the mountain, the image flattens. Raise or lower the camera a few centimeters until the planes breathe.
Don't overload the frame. A foreground should occupy between a quarter and a third of the frame. If it dominates more than half, it's no longer a foreground: it's the subject.
Check the edges. Cut-off branches, half-visible stones and grasses invading the corners destroy compositional cleanliness. A five-second sweep around the perimeter of the viewfinder avoids 80 % of the regrets at home.
To go deeper into balancing visual weights and lines within the frame, the article on dynamic visual composition is the natural complement to this technique.
Frequently asked questions
Do I need a wide-angle lens for strong foregrounds?
It's the classic tool (16–24 mm exaggerates the size of nearby things), but not the only one: with a 35 mm or a 50 mm you can build more compressed, natural layers. What matters is the relationship between distances, not the focal length.
What do I do if I can't find any interesting foreground?
Move. The foreground is chosen by walking: ten meters to the left there may be a rock with lichens that you can't see from the trail. If there's truly nothing, rethink the photo as a compressed landscape with a telephoto lens.
Do I focus on the foreground or the background?
On neither: focus on a middle point (roughly twice the distance to the foreground) and stop down to f/11–f/16. Focusing on the background wastes depth of field behind infinity.
Should the foreground always be at the bottom?
It usually is because the ground is below, but an overhead branch framing the scene serves the same depth function from above. What matters is that a nearby plane exists.
The first ten minutes at the location
The foreground is the difference between showing a place and making the viewer step into it. Look for it before the overall composition, lower the camera, give it its third of the frame and secure sharpness with f/11 and focus a third of the way into the scene.
Next time you arrive at a location, spend the first minutes looking at the ground: that's where the photo begins. At Enfogram you have the 44 photography cards with the exact settings for every situation: print them, carry them in your backpack and shoot with confidence.