Light Diffuser: How to Really Soften Light
Softness depends on the apparent size of the source, not the material. A diffuser table with stops lost, the shadow each gives and when to use them.
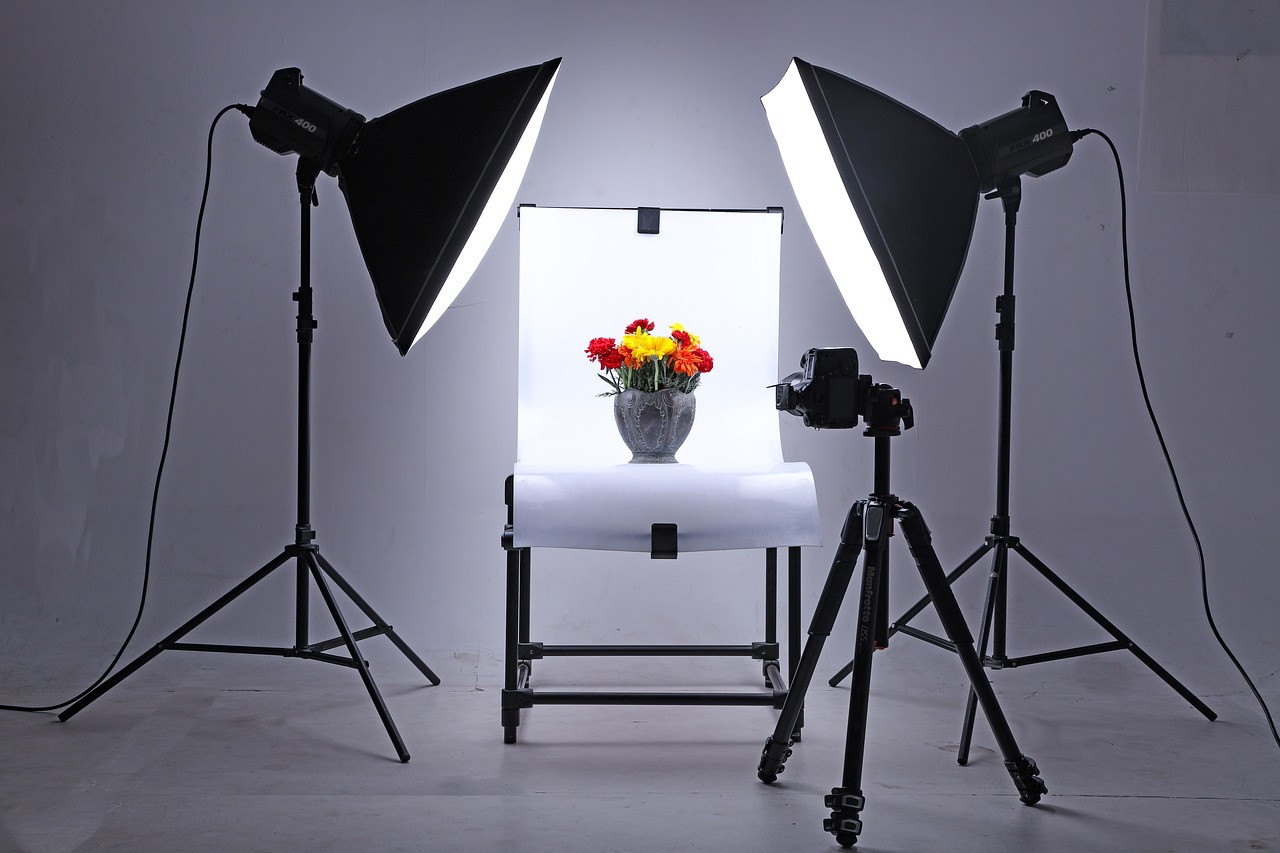
A one-meter softbox placed four meters from the subject gives a much harder light than the same softbox at fifty centimeters. What decides softness is not the diffusing material but the apparent size of the source: its physical size divided by its distance to the subject. That division is the whole theory, and it explains why a well-placed bedsheet beats an expensive, badly placed modifier.
Diffusing costs between half a stop and three stops of light depending on the material, and that loss is the real trade-off of the technique. The cheapest way to pay for it is to bring the source closer, because bringing it closer also makes it bigger.
What makes soft light soft?
The edge of the shadow. A source that is large in apparent terms lights the subject from many angles at once and the transition between light and shadow stretches out; a small source arrives from a single angle and cuts the shadow with a sharp edge.
The sun shows it better than any modifier: it is 1.4 million kilometers across and gives almost perfectly edged shadows, because at 150 million kilometers it occupies barely half a degree of the sky. A 60 cm translucent panel placed 60 cm from a face covers about 53 degrees: a hundred times more than the sun. The difference between hard light and soft light is that ratio and nothing else.
Hence the uncomfortable consequence for anyone who just bought gear: moving a modifier farther away turns it into a hard source. It's still a softbox, but it stops behaving like one.
The math you can check with a shadow
The width of the penumbra, the transition band, is well approximated with a multiplication:
transition width ≈ distance from subject to surface × (source width ÷ distance from source to subject)
Hold your hand 10 cm above a table and check the three cases:
60 cm panel at 60 cm from your hand: 10 × (60 ÷ 60) = 10 cm of transition. The shadow of your fingers practically dissolves.
The same panel at 3 m: 10 × (60 ÷ 300) = 2 cm. You can already tell the fingers apart.
Direct sun: 10 × 0.009 = less than 1 mm. Razor-sharp.
The first two cases are the same diffuser with opposite results. When someone says a diffuser "did nothing", it was almost always too far away.
How much light does diffusing cost you?
Between half a stop and three stops, depending on what you use. The exact figure depends on the material, its thickness and how much light escapes around the sides, and there is no reliable universal table: the only number that counts is the one from your light meter. Measure with and without the diffuser and subtract. It takes thirty seconds and replaces any figure written in advance.
You have three ways to pay for it. Suppose that without the diffuser you measured f/4, 1/125 s, ISO 400 in an interior with continuous light, and the panel costs you 1.5 stops:
Open the aperture: from f/4 to f/2.5 you recover 1⅓ stops, and you pay with depth of field. With a full-frame 85 mm at two meters, at f/2.5 you have about 8 cm of focus: the ear is right at the limit.
Raise the ISO: from 400 to ISO 1000-1250. No click lands exactly on 1.5 stops, so you round and accept some noise.
Bring the source closer: from 2 m to 1.2 m returns those 1.5 stops through the inverse square law, without touching the camera.
The third is usually the right answer, because bringing the source closer also makes it bigger in apparent terms: you pay for the diffusion and soften more on top of it. What it costs is light falloff. With the source at 1.2 m, someone standing 60 cm farther back gets a little more than one stop less, so for groups you have to move back and absorb the loss another way.
Diffusing and bouncing are not the same
Diffusing is extending the source: the light passes through the material and that material becomes the source, in the same place and the same direction. Bouncing is relocating it: the light goes off somewhere else, hits a surface, and that surface becomes the source, with a different direction and at a different distance.
Bounce gives sizes that no portable modifier reaches (a lit white ceiling is several square meters), and that's why flash bounced off the ceiling and walls replaces a softbox indoors. You pay for it in travel distance: the light goes farther and the surface absorbs, so a white ceiling at 2.5 m costs between 2 and 3 stops. And the color of the wall enters the photo: a beige one returns warm light, and a green one returns something you won't want to correct afterward.
Softbox, umbrella, panel or wall: which to choose
The column that matters is apparent size, width divided by distance. As a rule of thumb, above 0.5 the light comes out soft and below 0.1 it comes out hard, whatever material it carries.
Diffuser: 60×90 cm softbox at 1 m; Typical apparent size: 0.6-0.9; Approx. loss: 1-2 stops; Shadow it produces: Wide transition, clean edge; When to use it: Portrait and product with controlled spill
Diffuser: 100 cm translucent umbrella at 1.5 m; Typical apparent size: ~0.7; Approx. loss: 1-2 stops; Shadow it produces: Soft and enveloping, high spill; When to use it: Small, light-colored rooms, quick setup
Diffuser: 100 cm reflective umbrella at 1.5 m; Typical apparent size: ~0.7; Approx. loss: 1-1.5 stops; Shadow it produces: Soft with a bit more contrast; When to use it: When you need output and can't get closer
Diffuser: 110 cm translucent panel at 1 m; Typical apparent size: ~1.1; Approx. loss: 0.5-2 stops depending on density; Shadow it produces: The softest on the list; When to use it: Taming direct sun outdoors
Diffuser: Bounce off a white ceiling at 2.5 m; Typical apparent size: >1; Approx. loss: 2-3 stops; Shadow it produces: Enveloping, overhead; When to use it: Interiors with a low white ceiling
Diffuser: Diffusion dome on the hot shoe, at 2 m; Typical apparent size: ~0.04; Approx. loss: 1-2 stops; Shadow it produces: Hard: softens nothing; When to use it: Only in light-colored rooms, to seed bounces
Diffuser: Direct sun; Typical apparent size: ~0.01; Approx. loss: 0; Shadow it produces: Defined edge, high contrast; When to use it: Texture, geometry, backlighting
The hot-shoe dome row is the one that generates the most debate, and the arithmetic doesn't leave much room: it's as big as the flash head, so at two meters it's still a tiny source. It costs real stops and doesn't soften the shadow. What it does is scatter light toward the walls and ceiling, which is why it works in a white living room and does nothing outdoors.
For the rest, the studio lighting guide covers how these modifiers combine with fill light and backgrounds.
Does improvised diffusion work?
Yes, and for the same reason expensive gear fails when badly placed: only size and distance count. Baking paper, a translucent white shower curtain or a thin sheet stretched between two stands, with one meter of surface area and one meter from the subject, give a light that a small, distant modifier can't match.
Two conditions:
Separate the material from the lamp. Baking paper stuck to the flash head is a diffuser the size of the head. A large sheet at 40 cm is a large source.
Check the color. A cream curtain or a sheet washed with brightener tints the light. Shoot a gray reference before the session and set the white balance.
And the warning that isn't optional: improvised diffusion goes near LEDs and flashes, never near tungsten or halogen lamps. Those heat up enough to burn paper and cloth, and give no warning beforehand. With tungsten, the diffuser has to be fireproof material mounted at a distance from the lamp. A studio flash with a powerful modeling lamp falls under the same warning.
Frequently asked questions
What is a light diffuser and what is it for? A light diffuser is a translucent material placed between the source and the subject so the light comes out spread across its whole surface instead of from a single point. It enlarges the source and softens the edge of the shadows, in exchange for losing brightness. Its effect depends on the size of the diffuser and its distance to the subject, not on the material.
How do I make a homemade light diffuser? Baking paper, a white shower curtain or a thin sheet work if they are large and close to the subject, not to the light. Set them up a meter from the subject and separated from the lamp, and check the white balance because fabrics tint. Use them only with LED or flash: near a hot tungsten lamp they are a fire hazard.
Does a light diffuser eliminate shadows? No: it softens their edge and lowers the contrast, but the shadow is still there. To make it almost disappear you have to surround the subject with light, with a second fill source or a bounce opposite the main one.
How much light does a diffuser lose? The usual range goes from half a stop to three stops, depending on the material, the thickness and how much light escapes around the sides. The reliable figure is the one your light meter gives, measuring with and without the diffuser; any number written in advance is an estimate.
Is a softbox or an umbrella better? The softbox controls spill and defines the edge of the light better, so it wins when the background or a second light has to stay clean. The umbrella sets up in seconds and spreads light across the whole room, useful in small, light-colored rooms. At the same size and distance, the shadow from both is very similar.
What to check at your next setup
Measure with a tape measure before touching the camera: diffuser width, distance to the subject, and divide. If it drops below 0.3, bring the source closer until it goes up, and only then adjust the exposure. Then look at the edge of the shadow under the chin: that band tells you more about the light you have than any modifier specification.
The 44 Enfogram cards come with the lighting diagrams and the settings for each situation printed on them, so you can have them next to you while you set up and not depend on memory.