Creative Histogram: How to Read the Light
Learn to read the photographic histogram to control exposure with creative intent. Patterns, ETTR technique, common mistakes and practical tips.
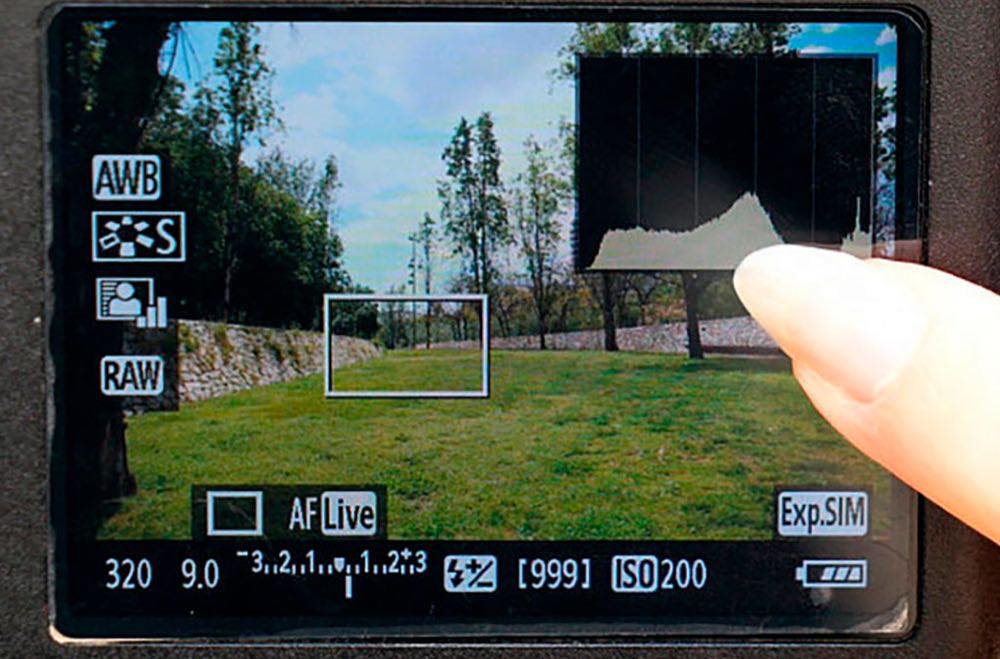
The histogram is the X-ray of the light in your photo: it shows how the shadows, midtones and highlights are distributed, with the dark on the left and the bright on the right. The LCD screen fools you with brightness, reflections and automatic adjustments. The histogram doesn't.
Reading it well tells you whether the shot will be underexposed, overexposed or balanced without depending on the preview, and its shape guides you when what you're after is a high key, a silhouette or a balanced landscape.
What is the histogram telling you?
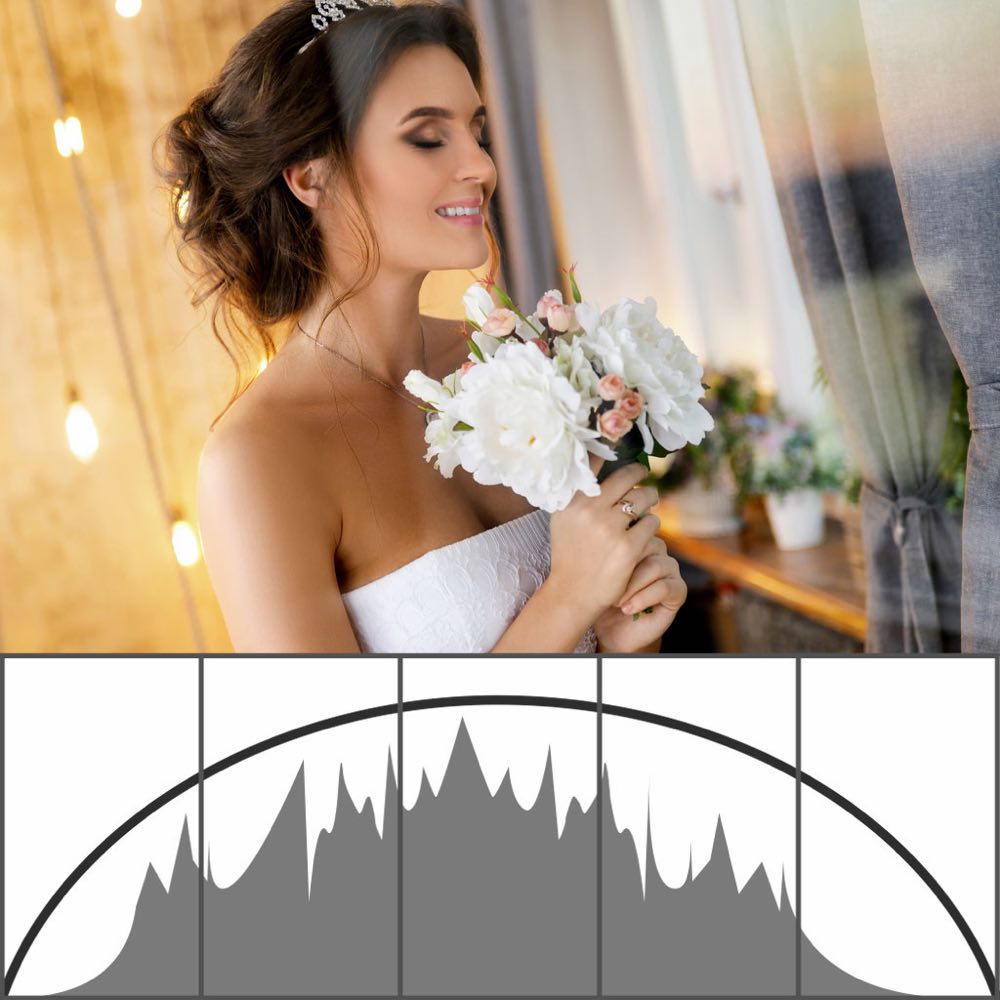
The histogram is a graph that represents the tonal distribution of your image. On the left side are the shadows, in the center the midtones, and on the right the highlights. A mountain toward the left indicates dark areas predominate; a load toward the right reveals a very bright photo.
There is no "perfect" histogram: it depends on the scene and your intention. What matters is reading the shape of the graph and deciding whether it matches your vision or whether you need to adjust the exposure.
The histogram can also be shown split by color channels (RGB). The red, green and blue channels each have their own graph and each can show clipping independently. This is especially useful when you photograph scenes with intense artificial lighting or sunset skies, where one channel can saturate before the others.
What shape does the histogram take in each scene?
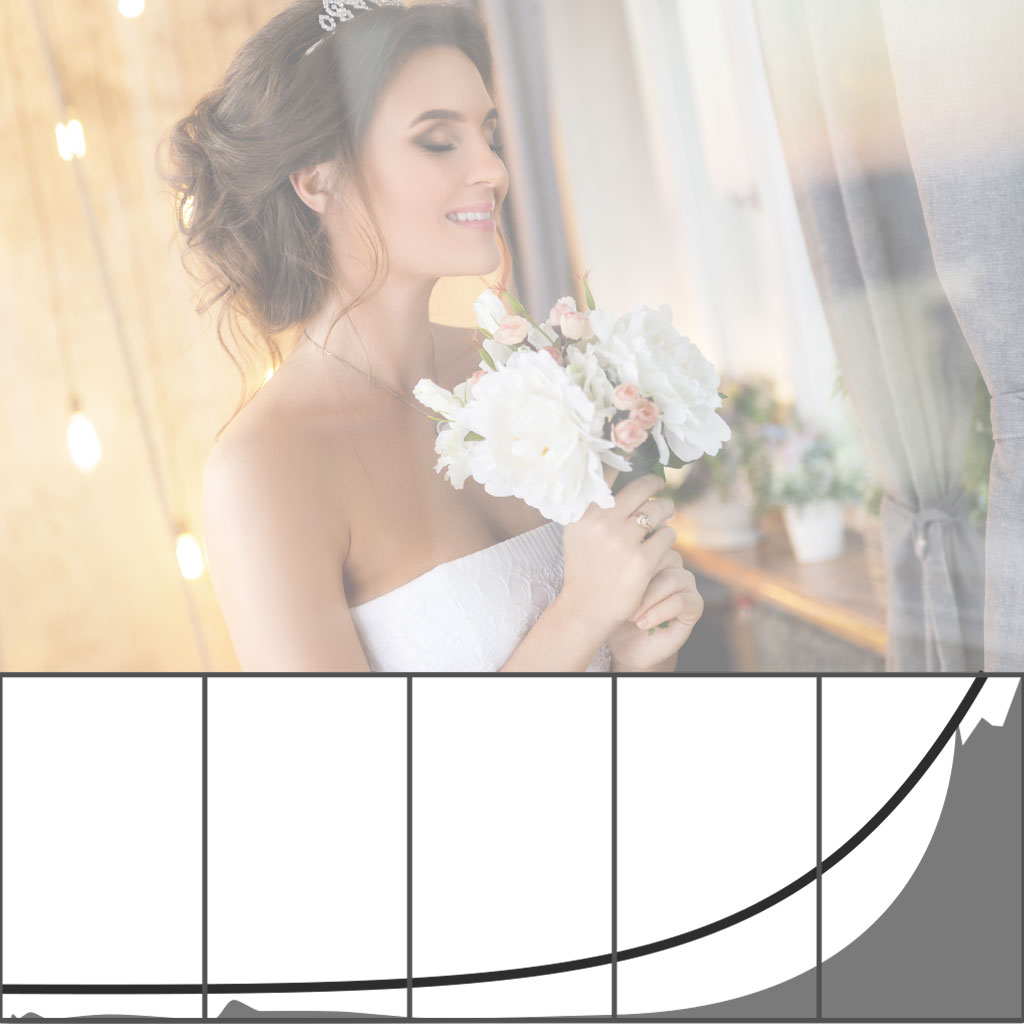
Scene or pattern: High-key portrait; Graph shape: Loaded to the right; What it means: Much of the information in the highlights and few details in the shadows
Scene or pattern: Silhouette at sunset; Graph shape: Peaks at both extremes with a valley in the center; What it means: Lots of black on the left and intense highlights on the right
Scene or pattern: Balanced landscape; Graph shape: Centered bell; What it means: Shadows, midtones and highlights distributed harmoniously
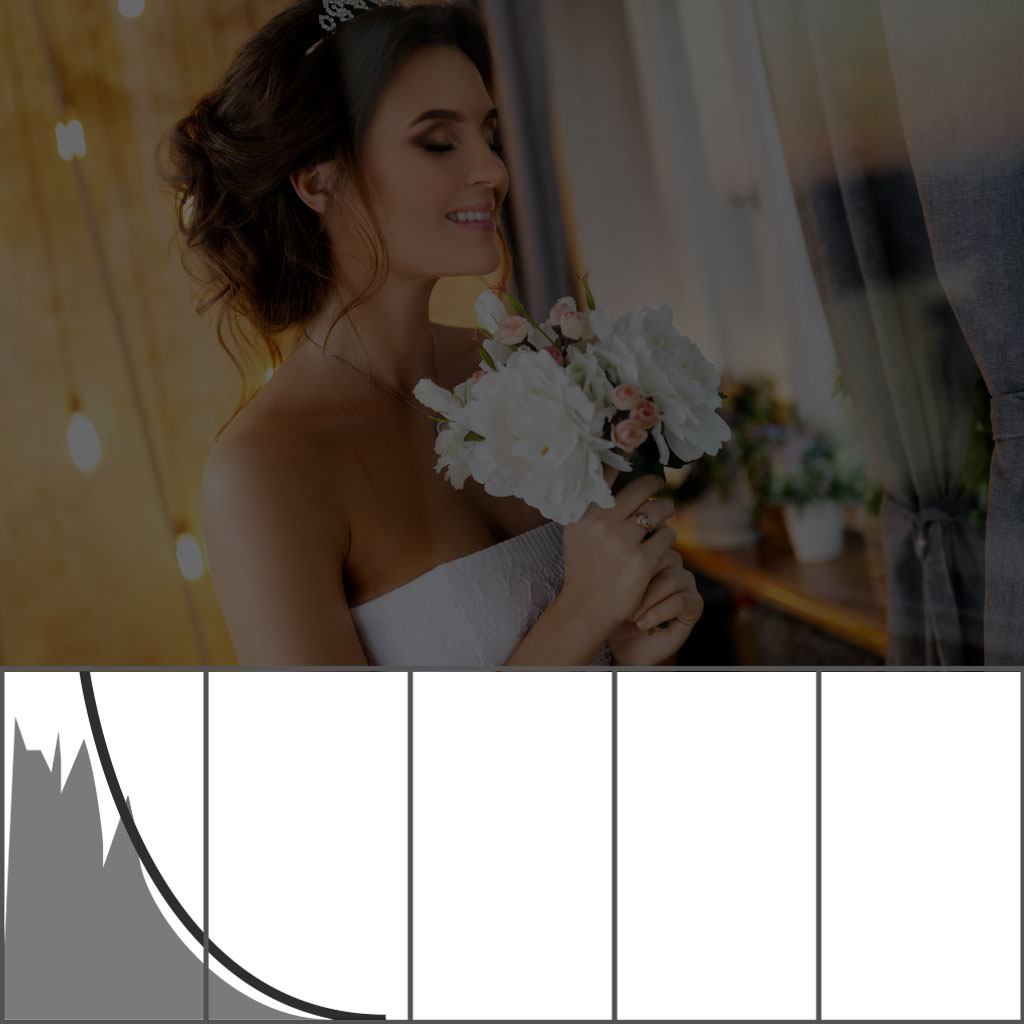
Scene or pattern: Night scene; Graph shape: Concentrated in the left third; What it means: Dark tones predominate
Scene or pattern: Comb; Graph shape: Alternating peaks and valleys; What it means: Very high-contrast scene with few midtones; typical of very sunny days with hard shadows
Scene or pattern: Crushed to the left with clipping; Graph shape: Cut off against the left edge; What it means: Shadows with no information: severe underexposure
Scene or pattern: Crushed to the right with clipping; Graph shape: Cut off against the right edge; What it means: Blown highlights; in RAW they can be recovered up to a point, in JPEG practically not
Recognizing these patterns saves you frustration and confirms on the fly whether the exposure matches your intention.
How do you set up the camera to see the histogram?
Most cameras show the histogram directly on the LCD after each shot. Some include highlight alerts or zebras, which flag overexposed areas. You can also check separate RGB color histograms, which is useful when you work with high-contrast scenes or with artificial lighting that tends to saturate one particular channel.
Check the histogram after key shots, not after every shot.
Many modern mirrorless cameras show the histogram in real time in the electronic viewfinder. If you have that option, turn it on: you correct the exposure before shooting instead of repeating the shot.
To see how light metering relates to what the histogram shows you, check out our article on strategic light metering beyond the automatic meter.
Common mistakes when using the histogram
One of the most common mistakes is always chasing a centered histogram, as if it were the only valid shape. This leads to flat photos with no intention. Another mistake is ignoring clipping, that is, the loss of information in highlights or shadows. When you see an abrupt cut at the extremes, it means parts are completely black or white with no detail.
Relying only on the LCD screen is another trap: what looks well exposed may not be, and the histogram is the objective confirmation. The fourth mistake is forgetting your creative intention and over-correcting, which loses the atmosphere you were after in the scene.
An additional mistake is not distinguishing between the histogram of the preview JPEG and the real range of the RAW file. The RAW sensor captures more information than the histogram shows in camera, especially in the highlights. This means a small amount of clipping visible in the camera's histogram may be recoverable in editing if you shoot RAW.
When is it worth using ETTR and bracketing?
A popular technique is ETTR (Expose To The Right), which consists of pushing the histogram's information as close as possible to the right edge without overexposing. This lets you capture more detail in the shadows and improve quality in editing, because the darkest areas have a lower signal-to-noise ratio.
If the clipping occurs in the highlights, the ideal is to adjust the exposure on the spot so you don't lose information. If instead the shadows are merely very dark (not pure black), they can often be lifted in post-processing, with some added noise. Another useful strategy is exposure bracketing, where you take several shots at different values and then choose the one that best preserves the information according to the histogram.
ETTR pays off mainly in landscape, studio and product work, where you have time to adjust before shooting. In action or events it isn't always practical, but check the histogram between series and correct the base exposure there.
To understand how the histogram fits into a broader exposure workflow, see our guide to the simplified exposure triangle.
Frequently asked questions
Should I worry if my histogram isn't a perfect bell? Not necessarily. The shape of the histogram depends on the scene. What matters is that it reflects your intention: a silhouette won't have a centered histogram, and that's fine.
Is the histogram useful for RAW photography too? Yes, although what you see in the camera is an approximation based on the preview JPEG. Even so, it remains a very useful guide and, in the highlights, a conservative one: it usually shows more clipping than the RAW actually has.
What do I do if my camera has no live histogram option? Check it after each shot from the playback screen. It's not as quick, but you learn to read light with the same precision.
When should I use the RGB histogram instead of the overall one? Use the RGB histogram when you photograph scenes with intensely colored lights (neon, sunrises, tungsten lights) to verify that no individual channel is saturating, even if the overall histogram looks right.
What to jot down for your next outing
Interpret the shape of the histogram according to the scene and your intention, not against a centered ideal: a graph loaded to the left or the right is sometimes exactly what you need to convey atmosphere. What you do check on every key shot is the right edge, because highlights that are cut off don't come back in JPEG.
Enfogram is 44 printed photography cards: the settings in your hand, at five in the morning, without depending on memory or on this article.