Panoramic and Architectural Photography
Panoramas expand your field of view but demand precision to avoid stitching errors; architecture demands perspective control.
Manual, vertical and 30 % overlap. With exposure, focus and white balance locked, the camera in portrait orientation and each shot sharing at least 30 % with the previous one, the stitching software has nothing to invent. For architecture the rule is different and shorter: keep the sensor parallel to the facade and the verticals come out straight; the moment you tilt the camera upward, they converge.
Panoramas expand your field of view beyond the limitations of the lens, but they require technical precision to avoid stitching errors. Keystone correction (that convergence) is fixed with a tilt-shift lens or in editing, and it always costs pixels at the edges.
Why do a building's verticals lean?
In architectural photography, lines are the essence of the composition. A leaning building conveys carelessness. When working with architecture, take care of verticality and horizontality above anything else. A wide-angle lens helps include more of the scene, but it also adds optical distortion at the edges and exaggerates convergence.
To keep lines from converging excessively, the ideal is to use tilt-shift lenses or correct in post-production with perspective tools. The goal is always for the lines to be a narrative resource, not a technical error. Remember that there are ideal lenses and gear for every job, but in the end, we must do the best we can with what we have.
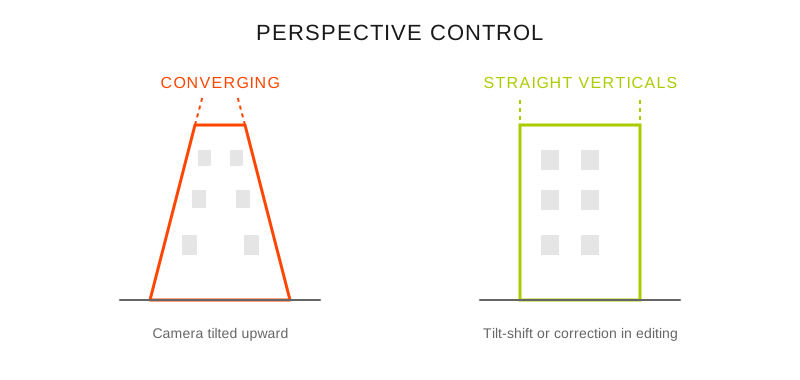
Tilting the camera makes the verticals converge; a tilt-shift lens or keystone correction puts them back in place.
How much overlap does a panorama need?
Panoramas let you show a space or landscape in its full breadth, but poorly executed they fill up with cuts and jumps that break continuity. The basic rule is to shoot in manual mode, keeping exposure, aperture, ISO and white balance constant.
A tripod with a panoramic head is the ideal tool: it ensures the rotation axis is aligned and reduces parallax errors. Handheld you can also get good panoramas if you rotate on your own axis and keep an overlap of 30% or more (50 % if there are nearby objects). Set the focus just once before starting (the hyperfocal distance is a good place, and the hyperfocal calculator gives you the number for your focal length and aperture) and don't touch it again between shots.
With editing we can correct errors or imperfections, but the cleaner the capture, the less we'll depend on software to "fix" joins.
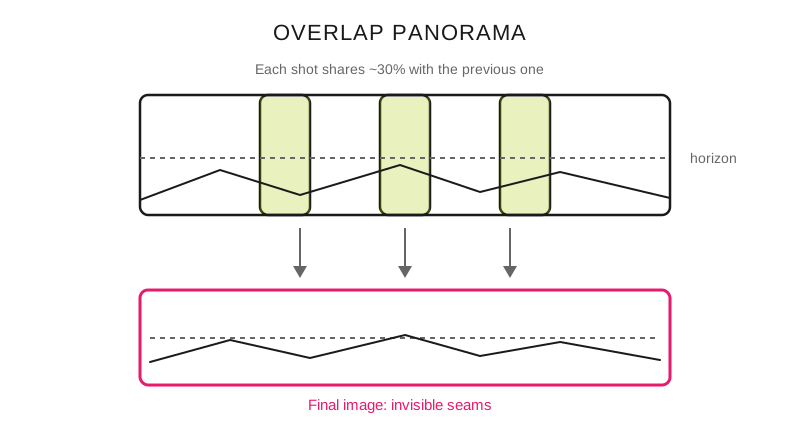
With fixed manual exposure, a leveled horizon and ~30% overlap, the shots join without visible cuts.
What do I do for each type of panorama?
Horizontal panorama: 30–50% overlap, pivot at the nodal point.
Vertical panorama: multiple rows for full buildings.
Large interior: 360° spherical panorama for virtual tours.
Architectural correction: tilt-shift lenses or correction in post-production.
What settings do I lock before the first shot?
Manual mode: fixed exposure, focus and white balance.
Portrait orientation: higher vertical resolution in the final result.
Panoramic head: precise rotation at the lens's nodal point.
Overlap: 30% minimum, 50% for complex scenes.
What do I shoot in each scene?
Scene: Horizontal landscape; How you shoot it: One row, camera in portrait; Overlap: 30 %; Pivot point: Lens nodal point; What breaks if you fail: Patchy skies from automatic exposure
Scene: Full building; How you shoot it: Several vertical rows; Overlap: 30–50 %; Pivot point: Nodal point, ball head with stops; What breaks if you fail: Converging verticals in the upper rows
Scene: Large interior; How you shoot it: Spherical 360°, panoramic head; Overlap: 50 %; Pivot point: Nodal point, essential; What breaks if you fail: Parallax on nearby furniture
Scene: Front facade; How you shoot it: Single shot, sensor parallel to the facade; Overlap: —; Pivot point: —; What breaks if you fail: Keystone if you tilt the camera
Scene: Scene with people or branches; How you shoot it: Fast burst, wide overlap; Overlap: 50 %; Pivot point: Nodal point; What breaks if you fail: Ghosts and cuts in the seam
Overlap goes up to 50 % as soon as something is near the camera: the closer an object is, the more it shifts between shots and the more room the software needs to fit it. With everything beyond twenty meters, 30 % is enough.
Common mistakes
Variable automatic exposure between shots (visible patches).
Incorrect rotation point (parallax errors).
Insufficient overlap in critical areas.
Moving elements in the seam zone.
Pro tips
Shoot RAW to have room for correction in shadows and highlights.
Correct perspective and proportions before adjusting color and contrast.
Think of the panorama as a narrative: beginning, development and visual close. The same leading lines and hierarchy that hold up a single photo have to hold up a picture three meters wide.
Frequently asked questions
Can I make a panorama without a tripod?
Yes, as long as you rotate on your own axis and not on the axis of your feet, keep the camera at the same level and raise the overlap to 50 %. The result fails when there are elements closer than two or three meters to the camera, because the parallax between shots becomes visible and the stitching software cuts where it shouldn't.
Why do bands or patches of color appear between shots?
Because the camera was in automatic mode and changed the exposure or white balance from one shot to the next. Shoot in manual with fixed aperture, shutter speed, ISO and white balance: it's the only way for all four shots to share the same sky brightness.
What is the nodal point and why does it matter?
It's the point in the lens around which the camera can rotate without nearby objects shifting relative to distant ones. If you rotate around the camera body instead of that point, parallax appears: a streetlamp in the foreground will move relative to the building behind it and the seam will be split.
Is it better to correct perspective in camera or in editing?
In camera, with a tilt-shift lens, because correction in editing stretches the pixels and crops the frame at the edges. If you correct afterward, frame wider than you need and apply the perspective correction before color and contrast.
Architecture comes alive when lines find harmony.
The 44 Enfogram cards come with the overlap, the shooting order and the settings to lock printed on them, so you can consult them with the tripod already set up.