Photography Mentoring and Teaching
Teaching photography consolidates your knowledge and develops the student's personal vision, beyond passing on technique.

Structure each session in three blocks (brief theory, extensive practice, reflective review) and teach principles instead of rules. A principle adapts to the scene the student has in front of them; a rule breaks the first time the light doesn't cooperate. That is the difference between a class that is remembered and a list that is forgotten.
Teaching photography consolidates your own knowledge while you contribute to the growth of the photographic community.
Effective teaching goes beyond passing on technique: it involves developing the student's personal vision, encouraging safe experimentation, and providing constructive feedback that speeds up learning.
Every student learns differently, so pedagogical adaptability weighs more than the syllabus.
What does the student gain from mentoring?
Photographic mentoring is one of the most complete ways to learn. It combines theory, practice and feedback in a safe environment, where community and guidance boost every step forward. Instead of walking alone, a mentor and a network of peers can help you speed up your progress and develop a style with its own identity.
Beyond mastering technique, what mentoring offers is clarity, direction and confidence. Every session, every review and every conversation become firm steps toward a stronger portfolio and a more authentic personal narrative.
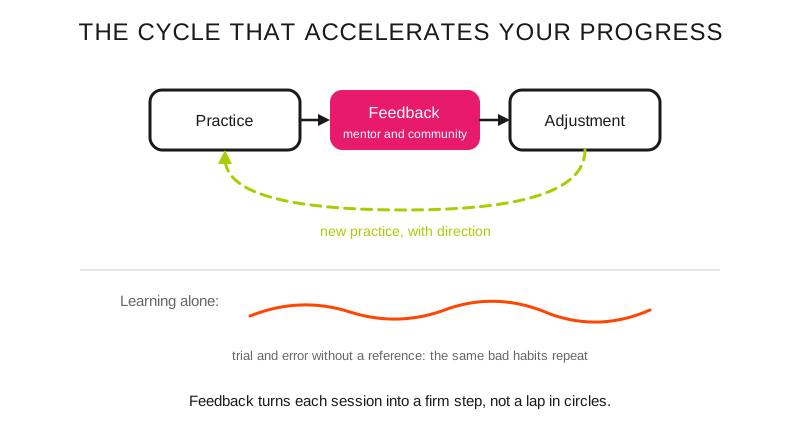
With mentoring, each practice–feedback–adjustment cycle accumulates progress; without an outside reference, the mistakes repeat.
Which teaching format do I choose?
Format: One-on-one mentoring; What the student receives: evaluation of their portfolio, their own goals, specific feedback; How you measure progress: comparison of series between sessions; When it doesn't work: if the student doesn't yet have work to review
Format: Group workshop; What the student receives: one concrete technique with supervised practice; How you measure progress: an exercise solved on the spot; When it doesn't work: if the group's levels are very uneven
Format: Educational content; What the student receives: tutorials with a logical progression and examples; How you measure progress: questions that arrive after watching; When it doesn't work: if nobody sends work back to be corrected
Format: Community and photo walks; What the student receives: constructive critique and a safe place to fail; How you measure progress: consistency: how many are still shooting after three months; When it doesn't work: if the critique turns into competition
One-on-one mentoring only pays off when there is material to look at, and there the student's first job is to select: how that selection is put together is in the personal style and portfolio guide. The long version of this same approach, with a calendar and exercises, is in photography mentoring.
How do I structure a session?
Pedagogical structure: brief theory + extensive practice + reflective review.
Materials: clear visual examples, technical manuals, additional resources.
Environment: safe for experimenting, failing, and asking questions without judgment.
Follow-up: measurable progress, achievable goals, celebration of achievements.
The mistakes that make a student quit
Assuming everyone learns at the same pace and in the same style.
Focusing only on technique without developing personal vision.
Destructive criticism that discourages instead of educating.
Not adapting the teaching to the student's real level.
Professional tips
Teaching philosophy: "teach principles, not rules. Principles adapt, rules limit."
Use the "sandwich" technique for feedback: something positive + area for improvement + positive reinforcement.
Every student who surpasses your level is your greatest success as a mentor.
Frequently asked questions
How much should I charge for mentoring?
Charge for it the way you charge for any other hour of work: calculate your hourly rate from your costs and the real time you put in, including the prior review of the student's photos, which can take as long as the session itself. The pricing calculator does the arithmetic and avoids the trap of setting a price by comparison with the photographer next door.
What is the difference between a course and mentoring?
A course delivers a closed syllabus and moves at the group's pace; mentoring starts from the work the student is already doing and adjusts the content to what fails in those specific photos. A course scales to a hundred people, mentoring doesn't go beyond a few, and that is why its price per hour is different.
How do I give harsh criticism without discouraging?
With the sandwich structure: something that works, the concrete area for improvement, and a final reinforcement that sends the student back to the street eager to shoot. The practical rule is to critique decisions (the framing, the aperture, the moment) and never the person: "this background competes with the face" can be fixed, "you have no eye" can't.
Do you need to be a professional to teach?
No, you need to be two steps ahead of the student and know how to explain why. Teaching what you have just learned often works better than teaching what you have mastered for ten years, because you still remember where the bottleneck was; what is mandatory is not making up what you don't know.
What to start the next session with
Ask for three photos from the student, not thirty, and a sentence about what they were trying in each one. With that you already have the session's syllabus, and it comes from real work instead of a script. When mentoring becomes a service with a price and clients, the positioning part is in the personal brand and networking guide.
The 44 Enfogram cards serve as supporting material in a session: each card is a topic with its settings printed, and the student takes the reference home.