Exposure Compensation: A Practical Guide
Learn to use exposure compensation in snow, backlight and night scenes with real examples. Get well-exposed photos in any scene.
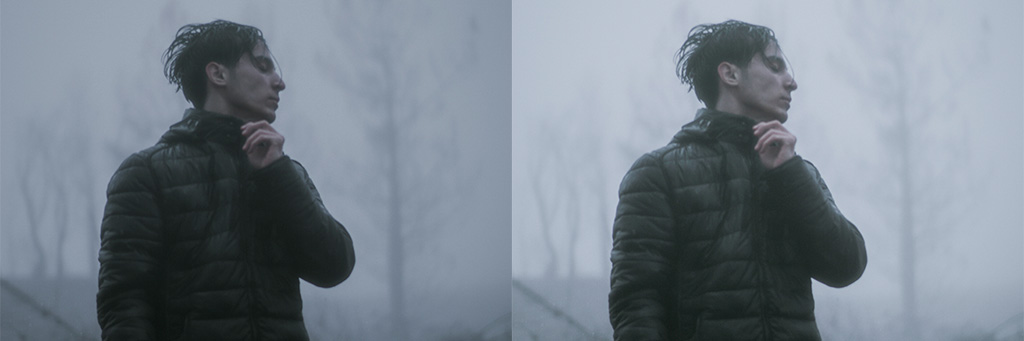
The camera does not read light the way your eye does. Faced with snow, sand or backlight, the meter gets fooled and hands you a grayish white or a face in shadow. Exposure compensation corrects that reading without taking you out of automatic mode: in snow, +1 or +2 stops; in a night scene, –1.
When we talk about exposure compensation, we mean the ability to "correct" what the camera considers correct exposure (the amount of light our image should have to look right). By raising or lowering the exposure value in steps (for example, +1, -1, +0.7), we get the camera to capture more or less light depending on the mood we want to convey. This adjustment does not replace manual control, but it is a practical tool for situations where the camera tends to get it wrong when we shoot in an automatic mode.
With this dial you handle snow, sand, backlight and night scenes without switching to manual. Below you have the reference values by scenario and the two mistakes that ruin your next session.

What is exposure compensation?
Exposure compensation is an adjustment that changes your camera's light reading without having to change all the parameters manually. If the camera thinks a scene should be darker than you want, you can move the dial to positive values (+) to brighten the shot. Conversely, if the camera brightens too much, you can use negative values (-) to recover shadows and atmosphere.
The most common values run from –3 to +3 stops on most cameras. For example, a portrait against a very bright background can improve by raising +1 stop, while a snow scene usually needs an adjustment of +1 or +2 stops so it does not look gray and dull.
Exposure compensation works together with the camera's light metering system. To better understand how that system works and when to trust it or not, see our guide to strategic light metering beyond the automatic meter.
When should you compensate the exposure?
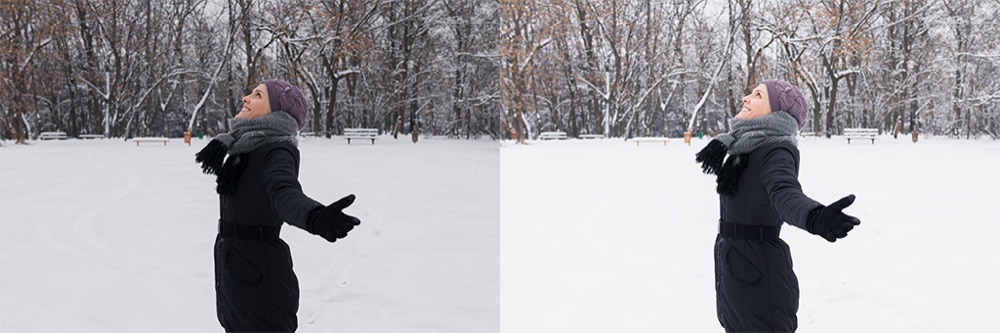
In scenes with snow or sand, the camera tends to darken the photo because it interprets the brightness as excess light. Adjusting to +1 or +2 stops gives you back the real whiteness. In backlight, when photographing a person in front of the sun or a window, raising around +0.7 stops helps keep the face from falling into total shadow. On the other hand, in night scenes, the light meter tries to brighten too much and the result looks artificial; here it is best to reduce –1 stop to keep the real atmosphere.
With portraits against very light backgrounds, such as a white wall or the sky, a slight positive adjustment (+0.3 to +1) keeps the background from fooling the meter and leaving the subject dark. And in landscapes with light atmosphere or haze, a small increase in exposure (+0.3 or +0.7) conveys the feeling of the moment better.
Quick reference table by scenario
Scenario: Snow or white sand; Recommended adjustment: +1 to +2; Why: The meter interprets the brightness as overexposure
Scenario: Strong backlight; Recommended adjustment: +0.7 to +1.3; Why: The bright background darkens the subject
Scenario: Night scene; Recommended adjustment: –0.7 to –1.3; Why: The meter tries to "brighten" the darkness
Scenario: Portrait on a white background; Recommended adjustment: +0.3 to +1; Why: The light background fools the meter and darkens the subject
Scenario: Haze or fog; Recommended adjustment: +0.3 to +0.7; Why: Preserves the atmosphere without losing detail
How does it apply in A, S, P and manual with auto ISO?
In A/Av mode (aperture priority), adjusting exposure compensation is very intuitive: you choose the aperture and the camera adapts the shutter speed. In S/Tv mode (shutter priority), you decide the exposure time and the camera adjusts the aperture; here compensation is useful for keeping the atmosphere. In P mode (program), the camera handles almost everything, but exposure compensation gives you that creative touch without complicating things.
Even in manual mode with auto ISO, compensation is still relevant because it affects how the system adjusts the ISO. It is an ideal combination when you want creative freedom without losing agility.
How do I confirm exposure with the histogram?
The histogram is the most objective tool for checking whether your compensation was enough. Unlike the camera screen, which varies with ambient brightness, the histogram does not lie.
Histogram weighted to the left: the photo is underexposed. Raise the compensation.
Histogram weighted to the right with clipping: there are blown-out areas. Lower the compensation.
Well-distributed histogram with a slight lean to the right: correct exposure with room in RAW to adjust highlights when editing (ETTR technique).
To go deeper into the creative use of the histogram, see our guide to the creative histogram: read light like a pro.
Common mistakes and how to avoid them
One of the most frequent mistakes is forgetting to reset the compensation after using it. This makes the next session come out lighter or darker for no apparent reason. Even if you shoot in manual mode, on many cameras the compensation shifts the zero point of the meter indicator, and you can end up misjudging the light.
It is also common to trust the screen blindly, when the ideal is to confirm with the histogram, which shows whether the photo is underexposed or overexposed. Also, do not forget that compensation does not only apply to ambient light: you can also use it with the built-in flash, changing the intensity of the light relative to the automatic metering the camera made.
Techniques related to exposure compensation
If you want to take exposure further, compensation can be combined with techniques such as bracketing, where you capture several photos at different exposure values and pick the best one afterward.
It is also the basis for creating HDR (High Dynamic Range) images, useful in scenes of extreme dynamic range such as landscapes at sunset, where you combine 3 or more images at different exposures to create a more balanced photograph. To see how this is applied in practice, visit our guide to photographic HDR: capture the full range of light without losing naturalness.
Frequently asked questions
Does exposure compensation affect image quality? Not directly; it simply adjusts how the camera measures and records light. However, extreme underexposure that is later corrected in editing can introduce digital noise.
Can I use compensation if I shoot RAW? Yes, it is even recommended because it gives you a more balanced file to edit afterward. RAW has more recovery room than JPEG.
Is it better to use it than to shoot in manual mode? It depends. In fast, changing situations, compensation is quicker. In controlled scenes, manual mode is still the best option because you have full control over every parameter.
How do I know how many stops to adjust without references? Start with ±0.7 stops, check the histogram and adjust. Over time you will develop intuition for each type of scene.
What to adjust on your next outing
Carry two numbers in your head: +1 in snow or sand, –1 at night. Shoot, look at the histogram and correct from there instead of trusting the screen, which changes with the light hitting you in the face.
And before putting the camera away, put the dial back to 0. A good share of the strange exposures the next day come from there. If you want the full run-through of the topic, the guide to exposure compensation brings scenarios and reference values together in one place.
The 44 cards from Enfogram come with these values printed by scenario, so you do not have to remember them while the sun is going down.