Exposure Compensation: How and When to Use It
Exposure compensation lets you make a photo come out lighter or darker than the reading your camera calculates automatically.

Snow in sun: +1.7 EV. Backlit subject: +1.7 EV. Night street with lamps: −1.3 EV. The light meter assumes everything it measures is middle gray, so it hands back gray snow and a gray night, and compensation is the control that corrects that bias without taking you out of automatic mode.
With exposure compensation we can make a photograph come out lighter or darker than the reading calculated automatically by the camera.
How does exposure compensation work?
Most cameras have a button with the +/- symbol.
Other cameras have a dial that you turn to adjust the exposure.
These values are measured in steps (stops) that represent half or double the light captured by the camera. For example, a photo with +1 compensation will have twice the light of one at 0, and a photo with -1 compensation will have half the light of one at 0.
The compensation scale runs from -3 to +3: -3, -2, -1, 0, 1, 2, 3.
Most cameras let you move in third-stop increments within that scale, so between 0 and +1 you have +0.3 and +0.7. A third is a small but visible difference in a smooth sky; half a stop is already noticeable on skin.
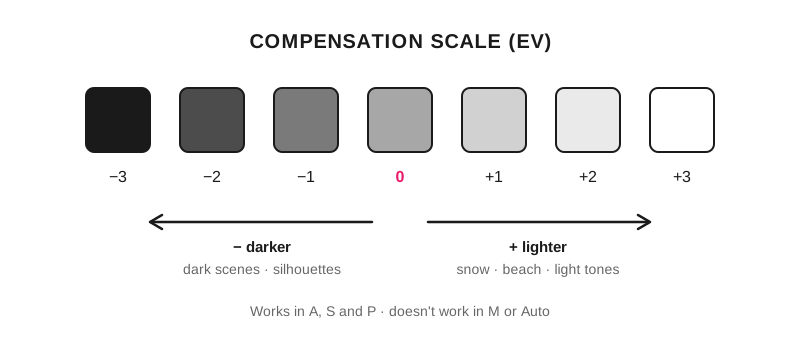
The EV scale from −3 to +3: each step doubles or halves the light captured by the camera.
How much do I compensate in each scene?
The light meter is calibrated to return a middle tone. When the scene is much lighter or much darker than that middle tone, the reading comes out biased in a predictable direction, and that's why the correction is predictable too:
Scene: Snow or salt flats in sun; Compensation: +1.7 EV; Why the camera gets it wrong: The snow fills the frame and is much lighter than middle gray; If you don't compensate: Dirty gray snow and bluish shadows
Scene: Beach with light sand; Compensation: +1 EV; Why the camera gets it wrong: Sand and water reflect and saturate the metering; If you don't compensate: Dull sand and dark faces
Scene: Backlit subject; Compensation: +1.7 EV; Why the camera gets it wrong: The bright background outweighs the subject; If you don't compensate: Unintentional silhouette
Scene: White overcast sky filling half the frame; Compensation: +0.7 EV; Why the camera gets it wrong: The white of the sky drags the reading down; If you don't compensate: Leaden landscape
Scene: Night scene with street lamps; Compensation: −1.3 EV; Why the camera gets it wrong: The camera tries to turn black into gray; If you don't compensate: Milky sky, noise in the shadows
Scene: Dark subject on a dark background; Compensation: −1 EV; Why the camera gets it wrong: The dominant black fools the metering upward; If you don't compensate: Gray blacks and blown highlights
The values are starting points with matrix metering. Confirm with the histogram before retaking the shot: if the snow is pushed against the right edge but not clipped, the exposure is correct even if it looks bright on the screen. The reading the histogram guide explains where each type of scene should fall.
Does it work the same in all modes?
A / AV — Aperture priority
In this mode we set the aperture and the camera automatically adjusts the shutter speed to produce a "correct exposure." Exposure compensation corrects a biased meter reading while keeping the aperture fixed. It's useful when you want to keep depth of field stable and a variation in shutter speed doesn't affect you.
S / TV — Shutter priority
We set the shutter speed and the camera automatically adjusts the aperture to produce a "correct exposure." Exposure compensation corrects a biased meter reading while keeping the shutter speed fixed. That way we make sure the subject is frozen or blurred as intended, giving priority to shutter speed, without giving importance to the aperture.
P — Program
In this mode the camera adjusts both aperture and shutter speed, at middle levels, to reach the "correct exposure." Exposure compensation corrects a biased meter reading by modifying one or both of the aperture and shutter speed settings. Program mode is not highly recommended since it doesn't prioritize any setting and generally only achieves mediocre results with no photographic intent.
In all three modes there's a detail worth watching: compensation is applied by moving a real setting. In aperture priority, +1 EV doubles the shutter time, and if that speed was already at 1/60 s, it goes to 1/30 s and camera shake appears. Light correction always gets paid for somewhere else in the exposure triangle.
Modes in which exposure compensation doesn't work
M — Manual
In this mode we set the aperture and shutter speed entirely at our choice. The camera doesn't allow exposure compensation since it assumes that we are manually reaching the desired exposure.
Auto
Since the camera takes charge of all settings automatically, it decides that exposure compensation isn't necessary.
Frequently asked questions
Why does my snow come out gray?
Because the light meter is calibrated to return a middle tone, and if snow fills the frame the camera exposes it as if it were gray. Compensate +1.7 EV to give the white back, and try +2 EV if the histogram is still far from the right edge. The full case, including light sand, is in exposure compensation on sand and snow.
Can you compensate in manual mode?
In classic manual there's nothing to compensate: you set aperture and shutter speed, so moving the compensation dial only shifts the needle on the indicator. The exception is manual with auto ISO, where many cameras do apply compensation by raising or lowering the ISO; it's worth checking your model's manual before relying on it in a session.
How much is a third of a stop and when is it noticeable?
A third of a stop is a light difference of 26% compared with the previous exposure. On a face it's barely perceptible, in a sky gradient it shows, and at the clipping threshold it decides whether a highlight is recovered or not. That's why the table values go in thirds: +1.7 EV, not "more or less two stops."
Do I compensate or change the metering mode?
For an entire skewed scene (snow, beach, night) compensation is faster and doesn't change the camera's behavior. For a small subject within a very different background, like a backlit person, spot metering on the face solves it better because it measures exactly what matters. The three metering modes and when to use each are in the strategic light metering guide.
Does compensation affect the RAW file or only the preview?
It affects the file. In A, S and P the camera changes shutter speed, aperture or both, so the sensor really receives more or less light. That's what makes compensating useful instead of correcting afterward: recovering two stops of shadow in development introduces noise, and having exposed them properly costs nothing.
How to know how much to compensate without guessing
Look at what tone dominates the frame. If what fills the frame is lighter than middle gray (snow, sand, sky, a white wall) compensate positively; if it's darker (night, black clothing, a theater) compensate negatively. Then confirm with the histogram and adjust in thirds until the important highlights land just before the right edge.
The 44 Enfogram cards come with this compensation-by-scene table printed on them, so you don't have to work it out with the snow in front of you.